|
Facility Assault: Weight: 160 - RUs: 0 |
DEPLOYMENT TEAM
|
The Mandrissa applauds you; take a bow. Then she tells you her sob story; you've heard it all before. You are ordered to first take over a Davion base, then recover some mechs there and attack a Steiner base, sewing discord and mistrust. Hmmm, things are getting murkier... perhaps it's merely Jason Cho's breath that smells like something rotten; even his Mom looks irritated by this saddleburr. Didn't anyone tell him not to play with his... tool?
[Your initial team weight is exceedingly light. The mechs you recover are 2 Enfields, 2 Jagermechs and a Shadow Cat, so plan your team around this sabotage salvage]
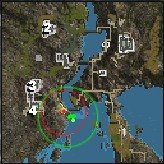
When you land, send your Raven North along the Eastern coast of the land-bridge and take out the two Sensor Towers covering it. Experience teaches that if you send a mech without ECM up the bridge even a short way, you will get into a tangle with 2 Jagermechs sent to investigate from South Bridge. Don't worry; you'll get to kill them later. Just get the sensor net down.
Destroy the Sensor Towers firstThere's a Resource Building (to the East) and a Resource Truck (to the West) on islands just North of the Drop Zone that you'll need a jump mech to reach. These are the only free resources in the mission (one wee exception later) that you can use for your own purposes. There is also a turret installation that's handy to have if you're going to tangle with the Jags; otherwise sneak up on the generator from the south and kill the turrets.
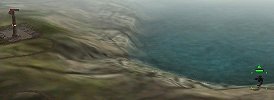
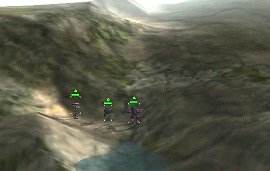
Your passage to exciting adventure!In any case, you'll next be be travelling North and then hugging the coastline bearing East. Soon you'll see the entrance to a deep rift in the cliffs. This is your way in to the interior and the ravines that encircle the Davion Base. You can take these ravines all the way to the Northernmost edge of the map and come out in back of the Davion Salvage Yard. You'll also be able to salvage one of the Davion mechs to use in your assault on the base if you scored those resources before.
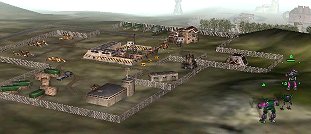
The Davion Salvage Yard[Of course you can go in the front door, taking the hilltop installation and the three Wolfhouds that guard it, then the turret controls right in front of the Base with their Enfield guardian. Just stay away from the river side, which is lined with LRMs pointing West, towards Steiner territory. I go this direct way when I am feeling feisty and ready for a quick assault. It's difficult with such a light team, however]
When you grab the Davion Weapons Facility at the Salvage Yard, you gain one of your most precious tools - Clan laser and PPC technology. Clan weaponry is just better, period - hotter, but longer range and more punch. Liao mechs coupled with Clan weaponry are devastating.
"Knock, knock" ... "Who's there?"
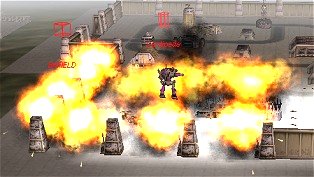
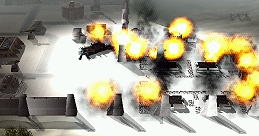
A gigantic superheated wall of fiery death, that's who...From the Salvage Yard, go South and around to the East wall of the Base. Notice the lovely, huge fuel tanks. Tsk tsk; this installation is really badly planned... like, can you imagine what happens if you pop someone up over the wall and the three Enfields in the installation catch a glimpse of you... imagine two of them running towards the gates... right near the fuel tanks... imagine popping up once again to target, not the Enfields, but the tanks? If you can, you don't have to imagine how to get in the gates either, because you'll blow the whole frickin' wall out! Kewl!
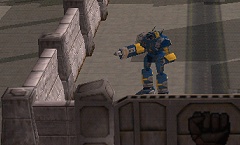
You can also take the Base by hopping the wall and grabbing the controls, blitzkrieg. You'll get more beat up, but it's way fun. By jumping in and out again, you can use the Base's own walls as cover. One Enfield will stubbornly refuse to budge from the 5 Resource Buildings, but also is not very aggressive; save him til last. Then pop a cap on his pale white mech-ass.
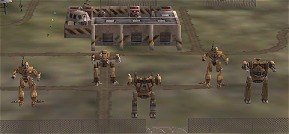
5 free mechs! What more could a girl ask for?[Make sure you salvage the Davion mechs in the Salvage Yard with those 5 RP injections, or you'll fail the Secondary Objective, and we all know by now (don't we?) that this is a supreme no-no. You don't actually have to salvage the mechs or even grab those RP buildings to technically finish the mission, but you'll hate yourself if you don't. I will not hate you; I will merely ignore you with contempt.]
After you have the Base, you can toy with the Enfield out front, as well as the three Wolfhounds you snuck around on the way in. Go around by the river side this time, taking turret controls and the two Jaggermechs guarding the middle bridge (if you didn't tangle with them before). Use those turrets against the Wolfhounds just because it's fun 😊 Afterwards, repair everyone up at the Repair Bay; you won't be seeing it again.
Now you control the entire East continent. Hah! Congratulate yourself. But now you have a dilemma... 3 bridges under your control! Which to take, which to take... there's benefits in all three, but here's the South Bridge approach; you'll see why soon.
Don't pay the troll at South BridgeHead South to the very first bridge. Notice a little Razorback guarding the far shore. Notice also a nice little ridge that runs into the water and parallels the bridge heading West. Take that and avoid the toll. When Piggie comes a-calling, smite him verily. Once you are across, keep heading West and South behind the ridge until you are across from Extract Zone.
Highlander, Highlander, wherefor art thou?Now you'll pick up sensor contacts and discern the reason for this approach: a Bushwacker and a Highlander. You want that Highlander! Especially since you only have enough resources this mission to salvage one mech. Make it this one.
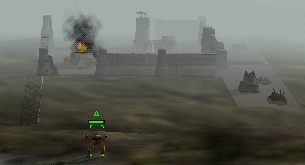
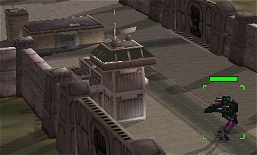
Breach the wall with the 'Cat's Gauss rifleUse the reach and power of the Shadow Cat's Gauss rifle to sneak up to the top of the ridge and take out the Southeast Watchtower and perhaps the autocannon turret in front of it. Then breach the wall in front of the generator and take that out too. If you finesse it right, the Bushwacker & Highlander won't see you (probably listening to DuranDuran in their cockpits). This is good.
Tip-toe through the Steiners...For fun, try sneaking in your Raven to the opened wall breach, using the Space Traffic Control building as cover, and seize the Gate controls. Then watch when the Highlander & Bushwacker try to chase you and the doors won't open for them. Hahaha ok... then you have the option of swinging around to the West, behind the fuel tanks, and playing Pin The Huge Fireball On The Steiner Unit. Choices, choices! What's a girl to do? Both, of course! Try not to mess up the Highlander too much ^-^
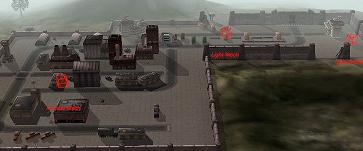
Now work your way around to the West side of the Base and North along the wall. You'll pick up contacts in the base; a pair of Hollanders and a Zeus. You'll also notice several ammo dumps, eh heh heh. I like to use them to vaporize the Hollander, because I hate them and their big noses. Do as you see fit, then send the Zeus packing. Grab Steiner HQ and the gate and turret controls. Keep your wounded Highlander well-back from the action; you can't repair him now unless you want to wait forever to march him back around to the Davion Salvage yard and the Repair Bay there. You don't need him, so pack him off to Extract to wait for you and make him stay put.
Steiner Base SouthHeading North, pay careful attention and stay well West to avoid the minefield, which is ringed with trees. About halfway to your destination, you'll notice a small staging area East of your path, and beyond it, the Middle Bridge guard installation. There's no good reason to take it (one small Resource Truck sits there) and many not to: mines, another Zeus, a brace of Razorbacks, a dozen ground crawlers, LRM turrets... besides which, you already have 5 mechs and a Highlander to boot; 4000 RPs aren't worth the trouble you'll get into; you can't even get a Repair Truck for that. Even if you need repair badly, it would be better to go back over South Bridge, now that it's in your control, head North to your captured Repair Bay, then take the Weapons Facility from North Bridge. So skip nimbly past, heading steadily North.
There's entirely too much ammo here for safetyYou'll come upon the Steiner Weapons Facility and a pair of Shootists. Good thing there's lotsa ammo dumps here too. Blow the ammo to kill the turrets, opening a convenient wall to walk through. Then decimate everything that moves... if anything's left. Capturing the Facility gives you Swarm LRM tech (great for Ravens).
Since you are probably banged up by now, and since capturing that Truck at Middle Bridge wouldn't net you enough to salvage a mech, you'd be smart to trot along back the way you came, skirting the minefield and hitting your Extract Zone. Don't be greedy; you have 6 mechs total salvage for this mission, including that yummy Highlander. Middle Bridge isn't worth it. (That said, I often take all three bridges and hunt down every single Steiner unit. I also confess to leveling every piece of Steiner occupation upon occasion, razing the installations down to smoking ash heaps. Call me conscientious, or call me an Avenging Angel-Bitch 😊

Written by relayer. Preserved here as part of the-spoiler.com archive. Original source: The Spoiler.