|
Ambush & Acquire: Weight: 190 - RPs: 6000 |
|
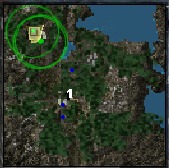
A simple mission to intercept a bandit convoy. Hunchbacks & Shootists become available. If you feel more secure with some weight behind you, you can pick up one of these heavier mechs now.
[In the last mission, all the Green recruits acquired basic combat skills and were promoted to Regular by making sure each member was responsible for some gunnery and tricky piloting. Use this mixing technique to swiftly advance your pilots in skills; give everyone something to do]

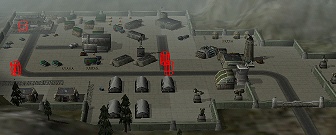
Straight North of your Drop Zone is a Checkpoint that needs to be defanged. As you move down the road towards it, note the small ravine to your right. This ravine has many strategic uses, and between it and the road is Porkchop Hill, a centerpiece of your early strategic positioning in this mission. At the North end of the ravine is an auxiliary set of turrets, so be careful. The ravine is a great place to ambush the Convoy.
What a lovely place for an ambush, eh, what?But first you need to take control of the checkpoint. One way is to move to the foot of Porkchop Hill, issue a Hold command, and then send one Razorback up through the trees so its' sensors can map out the opposition. This Piggie can also serve as a decoy, luring the checkpoint guards ( two Urbans and some Centipedes) down the road with a couple of well-placed teaser shots. So do it! Besides, this method leaves your salvage in a tidy pile for later retrieval 😊
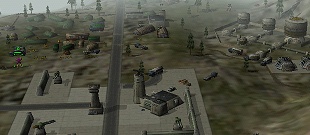
Checkpoint CharlyAfter the ambush, hop the Razorback into the checkpoint and take control of the turrets. Just forward and to the west of this checkpoint are two Resource Trucks; get 'em! This will also allow you to see the second guard team of Fire Ants ahead and to the right, just behind the Fuel Tanks which are the target at this Op point. TacOps has suggested you blow 'em, and huge fuel tanks going up can be verrrryy pretty... but restrain yourself. You shouldn't need their power, and leaving them will leave a key to prevent the mission from ending. You'll need this key later.
So repeat the process of ambush; take a few potshots at the Ants until they follow you mindlessly into their own turret fire. The guards will probably re-take control of the turrets on your way past... but it won't be for long, eh heh, so don't worry about it. When you kill these guards, you will be "Objective Accomplished". Now blow the turret generator. You really don't need the turrets, and if you leave them, they will kill the coming Resource Truck and Mobile HQ (ack!).
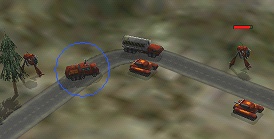
So while your Razorback works on the generator, hustle your team into the ravine. About halfway back is a nice little depression, perfect for a little picnic spot. Now wait; soon the convoy will be arriving. Coming down the road is a Cargo Truck, a Resource Truck, a Fuel Truck and the Mobile HQ, escorted by some Vedettes and a pair of Fire Ants. Mark the order of these trucks closely! The Convoy will attempt to stick together, and it's easy to destroy the Mobile HQ in many ways, so be careful! If it is destroyed, you have failed the mission.
It's easy to torch the Mobile HQ and fail the missionLure the Ants away and down the ravine to your nice picnic. Isn't that kind of you? Oops, i forgot; no one likes ants at their picnics... so crush them. Then take out the Vedettes, carefully. Finally, capture the Resource Truck and the Mobile HQ and blow the Cargo and Fuel trucks.
After you capture the Mobile HQ you get a new Objective: Capture the weapons facility to the Northwest.
Just down the road to the North, you'll pick up another sensor contact, a 4th Resource Truck tucked away in a storage complex on the edge of a small lake. West of this point is a Resource Building in an abandoned industrial area. These are the last available resource grabs for this mission. Hopefully your team is in good shape now and you can leave repairing until later.
Weapons Facilities give new weapons techWest of the lake is the complex proper. There is a nice hill to hide below just before you reach the road. Place your team here, and use a Razorback to catch the attention of the installation's defenses, an Urban and various crawlers, and lure them out to your waiting team. Then capture the turret controls and the gate controls, but you can't capture the Weapons Facility yet. One stubborn Fire Ant will refuse to leave until you close in, so take the whole team in and take it out quickly.
Not only do you gain Pulse Laser technology, but you trigger the Bandit Counterattack. Up til now, this has been a relatively soft mission. Now you face a formidable assault from a handful of Fire Ants and LRMs, which chew you up and prepare you for the entrance of a Starslayer. Ouch! Try to get the LRMs quickly; don't count on your captured turrets to do it. Next get the Fire Ants. Use your jump capabilities to keep moving out of the range of those nasssty Ant flamers; in a pack, they can strip armor quickly. (Try to use the lesser mechs to finally take out the 'Slayer, if you can. Your own Starslayer's lasers may tip the balance on the attacking 'Slayer into internal nuke, which will spoil your future plans. You want this 'Slayer badly, so be careful in bringing it down; it is the second component in your core team)
Your second Starslayer will make you happyWhen you succeed in killing the 'Slayer, TacOps will announce "Objective, Successful." If you blew the fuel tanks at OpPoint 1 before (which you were advised not to do) your mission would be over and you would have to lay out your own C-bills to purchase that 'Slayer! Tsk tsk tsk, this is simply not good business! Instead, being smart like you are, you left them, so now you should have at least 36000 RPs (minus one repair truck outlay) to salvage three mechs on your employer's dime! Huzzah! So take the 'Slayer and several Urbans, then go blow the fuel tanks to end the mission.
If you have been thrifty and crafty, you will be able to buy all the mechs you haven't overloaded from this mission's salvage. In this campaign, that's 10 Fire Ants plus the two salvaged in-field, plus the two Urban mechs also in-field. You also have the second 'Slayer, a Most Valuable Mech. And now you are also rich <or getting there>.
Written by relayer. Preserved here as part of the-spoiler.com archive. Original source: The Spoiler.