|
Mobile Assault: Weight: 330 - RPs: 12000 |
DEPLOYMENT TEAM
|
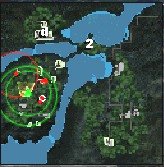
A long, but profitable mission. Major "D-Licious" Kelly tells you that you may be their only hope. How did she know you were a Jedi Knight... this mission gives you a chance to make some megaserious C-bills doing what you love best - max damage, of course! And who better deserving than your old associates, House Liao? It's also a good time to advance some of your pilots in rank and skill.
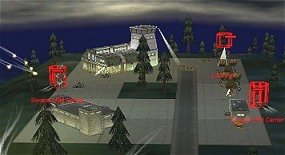
Start by heading East across the land bridge and then turn South towards the city and SecOb#E. A couple of Hetzers will engage you; when you fire back, a Shootist in the city will power up. He's trapped in a very bad position, however, and shouldn't be any trouble to melt. A second Shootist is in a similar boxed-in position right near the Industrial Complexes; smite him verily also, then destroy the Complexes. Make sure you capture the Resource Building there. A pair of Sha Yu patrol the hills outside the city and will show up sometime during your assault, unless you went up and got them first.
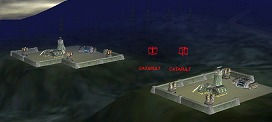
Ever get that boxed-in feeling?Due South of the city, up a rise, you'll discover two sets of turrets: LRMs and SRM Tundra turrets, which are clustered in rocks. These can be painstaking to take out despite being short-range because the rocks shield them from many angles. You'll probably also pick up a couple of sensor contacts from ground vehicles and a Zeus which is patrolling the Airport and will probably move on you as you work on the Tundra turrets. Lure him out; you don't want to go into the Airport itself just yet. Instead, swing around East of it, into the woods, where you'll encounter 2 Men Shen and a Raven guarding the area.
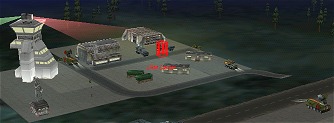
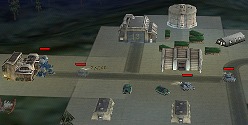
Excuse me; I'd like to book a flight to Hell...Then study the East approach to the Airport. Look for the two Aerospotters. One happens to be wedged in next to the Control Tower, near two Resource Trucks and a Resource Building protected by several LRM carriers. It's extremely easy to blow up those Resource Trucks! But if you have to sacrifice them, do so; you don't want a Shilone bomber coming down on you. They can cripple even a heavy mech in one pass, so make the 'Spotters top priority, even if you have to take a stinging from the LRMs. A good way to take them is to use a jumping mech and watch carefully for those targeting markers! It takes several seconds for a 'Spotter to triangulate on you, so keep hopping.
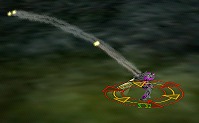
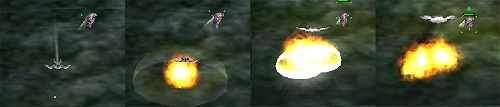
When you're the target of a Shilone bomber, get ready to jump!A mere leap upwards from behind the Hanger, targeting on the ammo dumps, will most satisfactorily crisp the waiting Hollanders. Kill all the Slayer bombers to accomplish SecOb#F. Frag the de-fanged Shilones just because. You might want to salvage that Zeus you fried.
Now, remember those SRM Tundra turrets? West of them, up a hill, sits a Mobile Orbital Gun and its' escort of 2 Hunchbacks and 2 Catapults. The 'Pults can really rain LRM hell on you, so use the dells and glens of the surrounding area to pop and shoot, esp at those fuel trucks handily nearby. The MOG can't hurt you, so use it as cover to snipe at the other units.
Fry this MOGWhen you've finished with this crew, you'll be informed that you've "completed your mission" - destroyed 1/3 of the enemy forces, and can now slip back to Extract and leave... or go on, and earn some extra C-bills. What kinda silly question is that?!?! Hmmmph. Not like it's only for the C-bills... that little rat tried to sell you out, so make 'em pay!
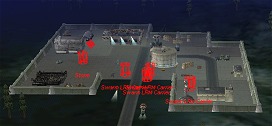
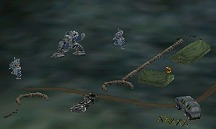
Ok... if you sit on this ridge long enough, you'll get sensor contacts from a patrol that runs north and south along the riverbank in a long loop - two Bushwackers and a Starslayer. Wait for them and kill them. Simple, no? Then head back down the road, past the Airport and towards SecOb#G, the Weapons Facility.
At first you'll see 2 Swarm LRM carriers and two Storms. But one move on the Facility will bring out an additional compliment of Swarm LRMs, Vedettes and an Anubis. All of this targetry will make it very difficult not to accidentally destroy the three fragile Resource Trucks parked there *wince* You can approach it from that riverbank you just cleared on the south shore, or you can simply go in the front door. Remember, Swarms don't track like LRMs, so keep hopping to avoid their deadly splash blasts.
Note - sometimes this Facility stubbornly resists capture; bug trackers pls note. I've had the best success at that point backing off, then doing a flying capture.
This place is swarming with Swarms! Haha get it?The Facility gives you the secret of Long Tom Cannons, artillery pieces that can be affixed to an assault mech (Jinx is way happy!) Head on down West and South to the riverbank and the light-blue area in the water that you can see on the map. This side of the bank should be clear, unless you didn't take on the shore patrol earlier, in which case you'll meet them here.
*Yawn* all that was boring, huh? Lotsa cover, hardly any opposition; guess these Liao peeps got kinda lazy, counting on those Shilone bombers to protect the Airport... well, pay attention: now you're going to assault the Liao HQ itself. You'll need to be repaired up to full potential, perhaps bolstered with that field-salvaged Zeus.
The Valley of the Shadow of the 'pultsHead across the river. Two Vedettes and two Ravens patrol the shoreline on the other side. A tall cliff wall is split by a narrow gap, guarded by two LRM installations and a pair of Catapults. The cliff can be jumped; the best place to do so is to the north, right near those lovely fuel tanks. Likewise, the turrets can be bombed, but it's much more amusing to capture at least one and let it help you with the 'pults. Whichever way you do it, stay to the south; you aren't ready for the North segment of the island yet.
Tsk tsk; all that ammo lying around sure is dangerous...When the Catapults are history, head South on the plateau. You'll see a Resource Building just west of you, then further West, a large ammo dump. Get the two Hetzers to chase you; those ammo dumps come in handy and you don't want them going up... just yet 😊
Too bad his repair work ain't gonna last long...West, over the ridge, you'll see a small staging area with a Repair Bay and a Resource Building. Look closely! Besides several Partisan tanks, there is a powered-down Atlas in the 'Bay. You may not see him unless you have direct visual contact but he is there. As soon as you fire on the Partizan tanks, he will power up. There are two ways to deal with him: since I have two Sharpshooters, I elect to lure him over the hill and poke his eyes out with a couple well-placed targeted shots. The other way is to use those huge ammo dumps you left before to flash his hash. Either way, burn this baby, then use the conveniently-supplied Repair Bay to patch up.
Top of the world, Ma!To the North of your position is SecOb#C - Headquarters. The defense crew there includes a pair of Swarm LRMs and several powered down mechs: a double dose of Catapult and a Lao Hu, which will power up on your approach. Go get 'em. Use the folded terrain to your tactical advantage. If you salvaged that Atlas, that wouldn't hurt either. Then salvage the Lao Hu.
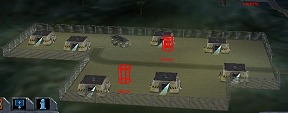
Now you're in the center of South Island and can pretty much rampage at will. But let's leave the shoreline turret installations alone for now, and head back West and south of the Repair Bay complex. There's a slope that leads down to the shoreline. A small emplacement is there; you'll see several SRM Tundra turrets, shielded by rocks, protecting two Resource Trucks.
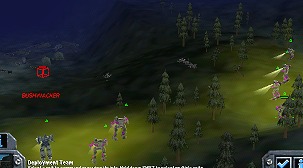
Bowling for C-billsA little closer examination will let you see three powered-down mechs - two Razorbacks and a Highlander. They will remain asleep as long as you stay away from the Resource Trucks. You'll also notice there's another shore patrol here, and it is a large one - two Bushwackers and 6 Sha Yu, running in pairs. So use the natural funneling features of this bowl to engage the patrols one by one, keeping well away from those honeytrucks. You might also take out the SRM turrets at the same time. Then wake up the Highlander and add him to your salvaged team 😊
More sleeping mechs! Liao discipline sure is lax...(alternately, you can just charge down and have a brouhaha - it's a wild fight at night with rockets exploding everywhere - but I hate to lose those Resource Trucks!)
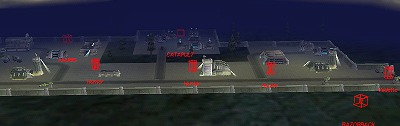
From this point, if you've been careful and thrifty, you should have a team that has no trouble taking out the 3 LRM turret installations to the North, despite the fact that some Hunters, Hetzers and a Raven wish to stop you. However, beware the northernmost installation, the one that covers the land neck back to your Extract Zone. Its' large pulse laser turrets can really hurt. So target the generator with a couple of fast and brutal jumping mechs, or use your captured Atlas, Highlander and Zeus to cut through the wall opposite the generator and take it out.
The hardest thing about taking this base is deciding who gets to shoot whomNow go down to the river shore; here you'll get a good picture of what awaits you on the other shore - An Anubis, a Catapult, 2 Razorbacks, a Hunchback and several Hunter missle tanks and Vedettes. Aren't you glad you took out those Sha Yu/Bushwacker teams before? You'll also notice, leading between the two Lookout Towers on the riverbanks, a shallows that can be used to cross the river. Need I say more? Just deal with the rabble! You can take this installation from the Northwest also, forcing enemies to attack you along the narrow land bridge. The Catapult will stay put inside the generator formation until you actually enter the installation.
Have fun; kick some Liao butt, blow the 3 generators and then grumble good-naturedly while you shepherd your rather ungainly team back to Extract Zone, making sure no wee little boogers (like Troop Carriers) have escaped you and prevented you from completing SecOb#B, Destroy All Enemies. If they have, be dogged and hunt them down. Why? Because that's why they pay us the big bux. Make sure to spend all your RPs.
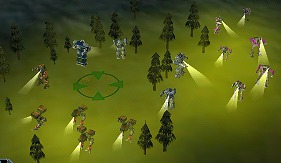
The Pokémôn Theory of Base Assault: Gotta salvage 'em all![Not bad; Drop with 6 mechs, Extract with 15. See, I told you that Mandrissa lady was nice! Flash made Ace]

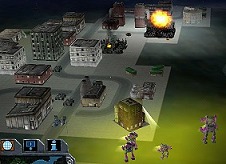
Written by relayer. Preserved here as part of the-spoiler.com archive. Original source: The Spoiler.