|
Liberate: Weight: 300 - RPs: 36000 |
DEPLOYMENT TEAM
|
Strictly speaking, this isn't a Davion op - it's your op. That freaky Mandrissa lady vids in to curse you in Chinese and then die. Too bad you never got to explain what a creep her son was. Likewise, forget explaining to Major Kelly - she has a condescending attitude towards Mercs (even tho you are saving her bacon yet again). At least she didn't sell you out to Colon-el Re-tard, who creeps out from under his rock to tell you he's seizing the civilian Spaceport. Since no one else on this ball of mud appears capable of doing the job, it's in your lap. But what's news about that?
Ev'rybody's talkin' at me... I don't hear a word they're saying...
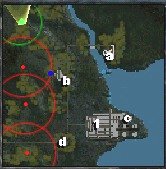
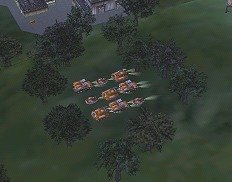
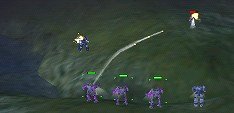
You start off in a ditch (what better metaphor for a Merc's life, eh?) with a trio of Razorbacks and a Hunchback on one side, and 4 LRM carriers on the other. What to do? Swing West around the bush cover, then send one mech up to take shots at the LRMs. The waiting mechs will run downhill into the ravine; much easier. Destroy them.
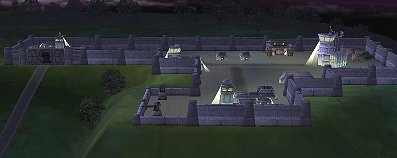
Don't mess with Long TomThen run down the ravine South and East to the foot of the bridge to SecOb#A, the Sensor controls. Greet the Razorback and LRM carrier guarding the bridge warmly. Just North of the bridge is a projection that can be used to leap across the river; take it and engage the Zeus and Hollander that come from the installation. Be wary! Those front turrets are Long Tom Cannons and you do not want to be lured into their range; you will experience extreme ouchy. Likewise, there are some sneaky LRM turrets behind the wall, on the inside of the installation. So keep your distance engaging the mechs, then do a quick run-jump-capture on both sets of turret controls. Grab the Repair Bay, Sensor controls and Resource Building too.
This Support wouldn't hold up used pantyhoseFrom the foot of the bridge, head South and West and on up the hill to Tabletop City and SecOb#B. Piece of cake; 3 Assault Choppers, a Heavy Chopper and two Storms are riff-raff in your way. When you've swept them up, you'll hear the Partisan Resistance Forces vidcomm - a couple of LRM carriers, Centipedes and small tanks. They will continue to patrol the town until you advance on the Airport. But they may never make it - there are several small patrols running west and east of the city who will pick fights with them, reducing this already pitiful auxiliary *ahem* to bupkiss. So help them out and kill these small mobile patrols before you leave.
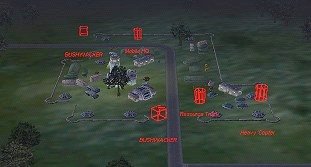
Op Point MookHeading South, stay well away from the Starport to the East for now. Get to SecOb#D and engage the pair of Bushwackers and the Storm guarding the Mobile HQ and Resource Truck. Capture these two vehicles first, before you capture the turret control, or the turrets will destroy them! Since you're already here, send someone south and west to the last Sensor Tower; there's a Resource Building at the foot of it.
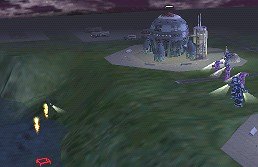
Swing back North along the road, well past the Starport, and then East down to the river, where you'll find a nice dip in the land to secrete your team in and get ready for the assault. Send a Scout mech along the dip to the water and you should see a good picture of half the Starport.
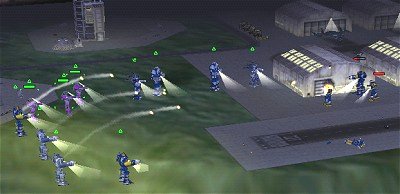
Don't bogart that mech, my friend...As soon as you move in, those Partisan units will start making their way towards the Starport. If you choose an attack vector east, behind the Hangers, you can stir up the bad boys: 2 Atlases, a Zeus, 2 Bushwackers and 2 Hollanders. Stay put and use the dip to your advantage to take them one by one. Stay north and away from the Starport LRM carriers' range; they'll chew you up. Let the Partisans (who have come when you started your assault) soften them up for you.
When you've dealt with this pack of curs, stay to the north of the hangers and along the shore to the east side. You'll find 3 Steiner dropships, and three Resource Trucks at their feet. You'll also pick up a sensor contact on the south side of the landing zone: tucked behind some fuel tanks is a single Razorback. To the west of the dropships are two Repair Bays and a Resource Building.
You'll be able to repair up, grab the resources, and take out the dropships without disturbing the LRMs and Razorback as long as you stay well away from them. This is good, because you'll want to build your team now for the final assault, which is triggered by the last LRM being dispatched.
This next part of the mission is nice and easy if you salvaged those two Atlases before, or the Zeus. Here's the reason to hold off the Steiner reinforcement wave:
Gidget, grab your board! Mechs up!Take a look at the water of the bay just off the cliffs there. See how there is a lighter band of blue? Shallower water. Remember the captured Davion dropship several ops ago? Same deal. When you fire on each dropship, a pair of mechs will power up and fly out of the water, aiming for you. There are 3 pairs: a Hunchback/Highlander; a Razorback/Highlander and a Hunchback/Razorback pair. Just aim and play Duck Hunter or engage them on the ground. Don't forget to blow the dropships when you're done playing.
So now all the heat is over and you have quite a pool of resources and mechs to choose from; choose wisely. Use the Repair Bays lavishly. When you are ready, set up in the dropship landing area and behind the Starport structures, then send someone forward to sweep the LRMs out.
Then wait. The first sortie - 2 Highlanders, a Hunchback and a Hollander - comes from the Southwest, down the road to Op Point Mook and the captured Mobile HQ, blowing everything up in their way and generally rampaging. About the same time, you'll lose your sensor grid - another team has blown your captured Sensor controls way up there in the Northeast. But don't worry about them yet; the SW team will arive first and you'll have plenty of time to spare. Instead, send a bait mech forward to razz 'em and lead them down the rosy path of doom. Your mechs are well-hidden by the Starport buildings.
The second prong of this reinforcement team has been working their way down through Tabletop City from the Sensor installation and should be arriving soon. They are generally coming in from the North and West so again, send a mech forward, go "neener, neener, neener" and walk these mechs right into your arms - 3 Razorbacks, a Highlander and 2 Hunchbacks. Boom! The mission is over when you kill the last mech.
Hey everybody... Steiner surprise party!!!!


Written by relayer. Preserved here as part of the-spoiler.com archive. Original source: The Spoiler.